The Air Project from Enygma
Air Project
This publication documented how we challenge our self to solve air-quality problems in an urban area.
The story began when severe air quality has become a significant issue in Jakarta, Indonesia. Everybody talks about it, but no one knows what to do, in our opinion, we are the ones to blame. For example, the habit of having a car for each person creates a general perspective that using public transportation is something complicated to do.
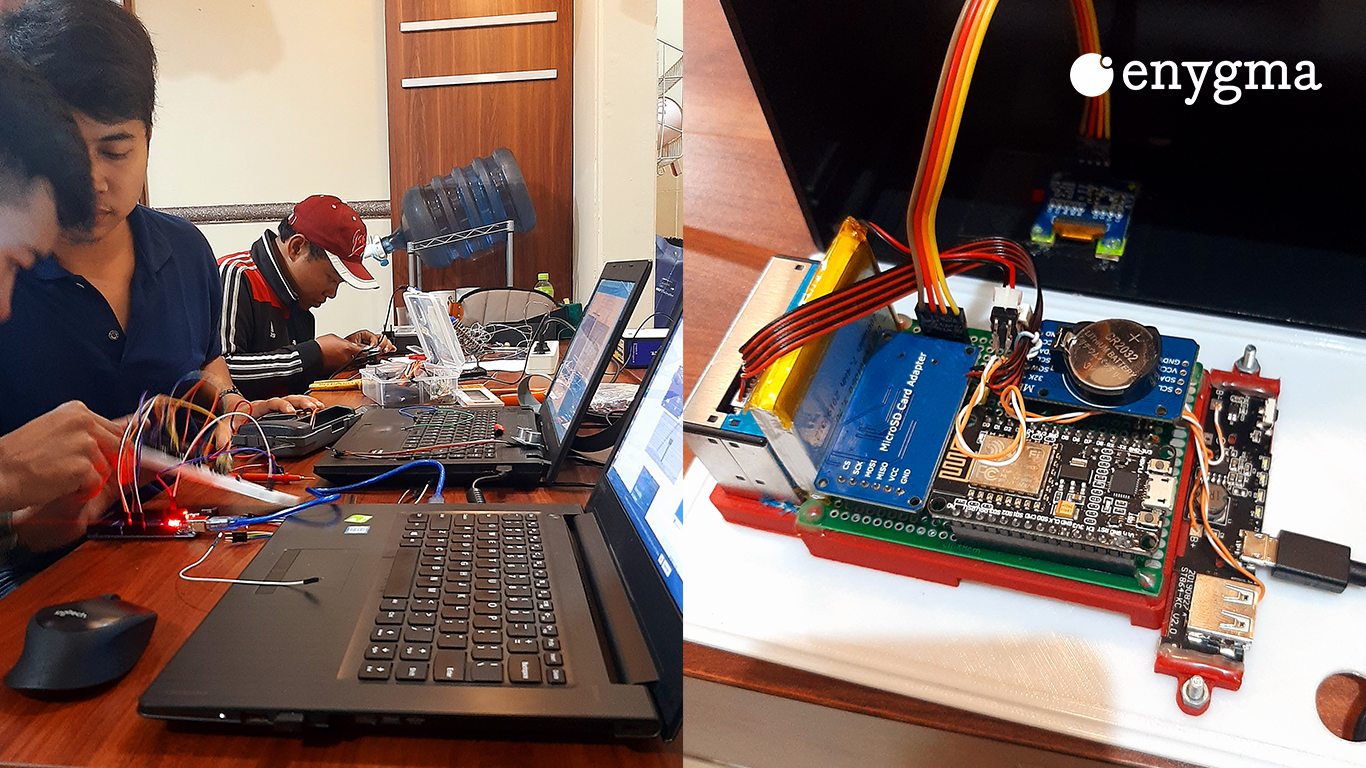
The idea is to make our own internet-connected indoor air quality devices. Our strategy is putting it at several spots of our office so everybody can see every time and reminds them how bad they contribute to worsening the air quality by using a private vehicle.
Price-Performance Ratio
To be able to define health recommendations on specific pollution exposure, first, we have to understand what air we breathe, to do that, there is no better method except using calibrated environmental sensors. In this case, we have to choose the one with the right price-performance ratio sensors. We use the undoubtedly NodeMCU ESP8266 CP2102 Wi-Fi IoT Lua Amica (Official Version) for the mainboard.
After digging on the internet, and some trials on a bunch of sensors, we come down to a set of sensors selection:
- SHT31-D from Adafruit (Temperature & Relative Humidity Sensor)
- ZH03A from Winsen Sensor (Laser Dust Sensor PM 1, PM 2.5, PM 10)
- MPL3115A2 from NXP (Barometric Pressure & Altimeter Sensor)
- ITEAD HW-181 Mic Module (to measure Sound Decibel)
- CCS811 from CJMCU (VOCs & eCO2 Sensors)
- MAX4409 from Maxim Integrated (Lux meter)
The reason is the sensors mentioned above have enough documentation and datasheet.

After choosing the sensors, we need to make it as portable as it can, complete it with power fail-over, data logger, and pack it with 3D printed case and belt to make everything tidy. It will need other supplies such as:
- 3.7V 2500 MAH Battery From Adafruit
- RTC DS1307 with Data Logger From RobotDyn
- 128X64 OLED (White only)
- Double-Sided 6X8 cm PCB
- 5V 2.1A Charging Circuit Board Module
- Some Pin Headers (Male-to-Female and Male-to-Male)
- Some JST Connectors
- X6 Black Project Box Cover
- Kapton Tape
And the game begins, our engineers work tirelessly to Harmonize the hardware and software sections. The biggest challenge is making it as simple as possible to operate while keeping it modular for further development.

Our first trial shows good results; all sensors return expected values. We also consulted with an environmental expert to check if the sensor’s reading values are reasonable.
Learning Nature Language
At this point, you may ask why we put such an effort to make our indoor air quality. Sure, you can buy a device like this online. Still, you can’t buy the learning process, and in our case, since we are also in smart environment business, to understand how air quality device work is a step closer to decode nature language.

We design a specific belt on a 3D printer to make all boards compact. We use the X6 project box, only its cover, and print the base. Fortunately, our team measure everything just right and succeeded in putting all the board in place on the first try.

Now for the programming, the expected scenario is to make the device independently read all the sensor’s result, store it in MicroSD card as a CSV file through the datalogger board. When the device connected to the internet, it will send all the data through HTTP POST protocol. And after 40 hours, the programming goals were achieved. The code is written in C/C++ using the Arduino IDE and directly communicate with our intelligent operations platform. Some of the sensor reading results need conversion with a reference table.
We also put a lot of time to make the device configurable. We also build the Wi-Fi manager so the device will act like an access point and redirect users to the configuration page.


In conclusion, the learning process has helped our team to understand the behaviour of each sensor. For our company, Enygma, It will be a priceless knowledge to more complex projects, comparing to its bigger brother, Automatic Weather Station, which we already have an experience to working with, some of the reading results is more sensitive to the change of device position placement.
Edit: The charging board producing heat, and since the positioning is too close to SHT31, the sensor gives a false high-temperature result. Our team is removing the charging board and place it into a separate box.
(EK)
